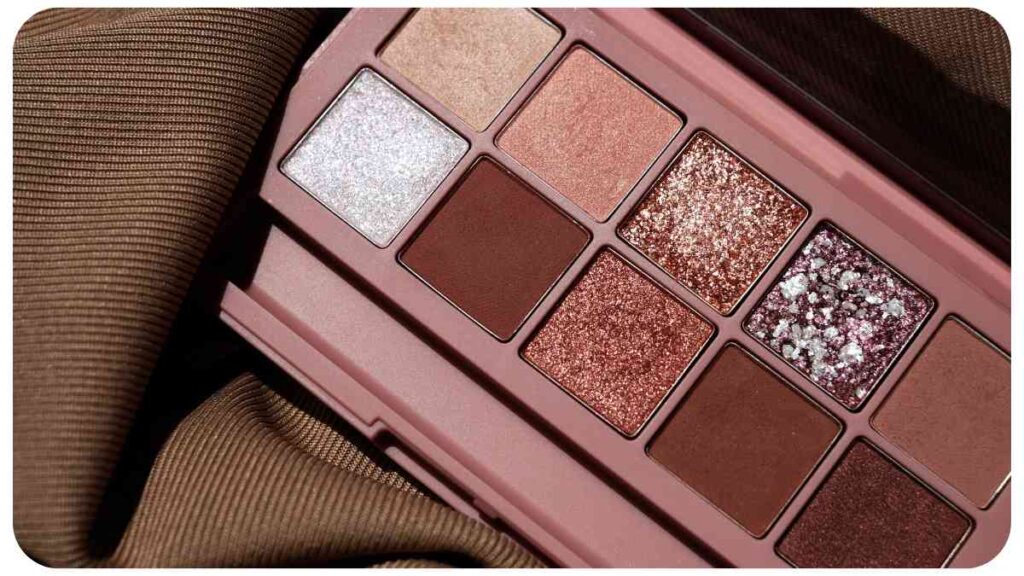
Welcome to our step-by-step guide on how to fix a broken eyeshadow palette! We’ve all experienced the frustration of opening our favorite eyeshadow palette only to find it shattered into a million pieces.
But fear not! With a few simple techniques and some basic supplies, you can revive your broken eyeshadow and get back to creating stunning eye looks. In this article, we’ll walk you through the process, providing expert tips, personal anecdotes, and detailed instructions along the way.
| Takeaways |
| Fixing a broken eyeshadow palette may seem challenging, but it’s a rewarding process that can save your favorite shades. |
| Rubbing alcohol is the preferred solvent for fixing broken eyeshadows, as it helps bind the powder back together. |
| Mix the crushed eyeshadow with rubbing alcohol to create a paste-like consistency, ensuring it’s spread evenly and packed tightly into the pan. |
| Allow the pressed eyeshadow to dry and set for a few hours or overnight before using it. |
| Clean and organize your palette after fixing it to ensure hygienic and easy use. |
| Consider using a pressing tool for more precise and even application. |
| Experiment with mixing colors to create custom shades or different textures. |
| If the damage is extensive, consider depotting the eyeshadows into a magnetic palette or repressing them with a base product. |
| Consult reputable resources for more detailed instructions and tips on fixing broken eyeshadow palettes. |
Understanding a Broken Eyeshadow Palette

Before we dive into the fix-it process, let’s first understand why eyeshadow palettes break in the first place. One of the most common reasons is mishandling during travel or if the palette is accidentally dropped. The delicate powders inside the compact can easily crumble due to the impact. High humidity or extreme temperature changes can also cause the eyeshadow to become brittle and prone to breakage.
If you love DIY makeup, you’re going to find The Ultimate Guide to DIY Makeup Tips and Tricks incredibly helpful. From homemade skincare recipes to fixing broken eyeshadow palettes, this guide has it all. Learn how to enhance your beauty routine and create stunning looks at home
Supplies Needed for Fixing a Broken Eyeshadow Palette
To fix your broken eyeshadow palette, you’ll need the following supplies:
- Rubbing alcohol (preferably 70% or higher concentration)
- Clean dropper or spray bottle
- Small spatula or spoon
- Tissue or paper towels
- Plastic wrap or a clean towel
- Palette knife or small makeup brush
- Empty eyeshadow pans (optional)
- Tweezers (optional)
- Makeup sanitizing spray (optional)
Now that you have your supplies ready, let’s move on to the step-by-step guide!
Having issues with your hair straightener? Find quick solutions in our guide on Troubleshooting Common Hair Straightener Issues: A Quick Guide. From temperature problems to tangled cords, this guide has answers to help you achieve sleek, gorgeous hair effortlessly. Say hello to hassle-free styling!
Step 1: Gather Your Broken Eyeshadow Palette and Tools
Start by finding a clean and well-lit workspace where you can comfortably work on fixing your eyeshadow palette. Gather your broken palette, rubbing alcohol, small spatula or spoon, tissue or paper towels, and a plastic wrap or clean towel to protect your workspace.
| Items Needed |
| Broken eyeshadow palette |
| Rubbing alcohol |
| Small spatula or spoon |
| Tissue or paper towels |
| Plastic wrap or clean towel |
Step 2: Crush and Consolidate the Broken Eyeshadow
Carefully open your broken eyeshadow palette and assess the damage. Using the small spatula or spoon, gently crush the broken eyeshadow pieces into a fine powder. Make sure to remove any large chunks or debris that may have accumulated.
| Steps | Description |
| Crush the broken eyeshadow into a fine powder | Use a small spatula or spoon to carefully crush the broken eyeshadow pieces. |
| Remove any large chunks or debris | Ensure that the crushed eyeshadow powder is free from any noticeable debris. |
Step 3: Add Rubbing Alcohol to the Crushed Eyeshadow
Once you have a fine powder, add a few drops of rubbing alcohol to the crushed eyeshadow. The alcohol will act as a binding agent to help consolidate the powder back into a solid form. You can use a dropper or spray bottle to control the amount of alcohol you add.
Discover 17 Makeup Products You Need to Try Right Now to take your makeup game to the next level. Whether you need products for fixing smudged lipstick or achieving flawless looks, this curated collection has you covered. Transform your beauty routine and achieve stunning results
| Steps | Description |
| Add a few drops of rubbing alcohol to the powder | Gradually add rubbing alcohol to the crushed eyeshadow powder, ensuring that it is evenly distributed. |
| Mix the powder and alcohol until it forms a paste | Use a small spatula or spoon to mix the powder and alcohol until you achieve a thick, paste |
like consistency. The goal here is to create a paste that is malleable and can be pressed back into the eyeshadow pan without crumbling.
Step 4: Mix and Press the Eyeshadow

Now that you have a paste-like consistency, it’s time to mix and press the eyeshadow back into its original shape. Using the small spatula or spoon, gently press the paste into the empty spaces of the eyeshadow pan. Ensure that it is spread evenly and packed tightly to avoid any air pockets.
| Steps | Description |
| Press the paste into the eyeshadow pan | Using a small spatula or spoon, gently press the paste into the empty spaces of the eyeshadow pan, ensuring even distribution and packing. |
| Smooth the surface for a seamless finish | Use the back of the spatula or spoon to smooth the surface of the pressed eyeshadow, creating a seamless finish and removing any excess product. |
Remember, if you have multiple shades in your broken eyeshadow palette, repeat this step for each shade, ensuring they are separated and packed into their respective pans.
Tired of smudged lipstick? Don’t worry, we’ve got you covered. Check out our article on How to Stop Your Lipstick from Smudging: Quick Fixes to learn simple, effective techniques for preventing those pesky smudges. Say goodbye to makeup mishaps and hello to a flawless pout!
Step 5: Let the Eyeshadow Dry and Set
After pressing the eyeshadow back into the pan, it’s important to let it dry and set completely. This process usually takes a few hours, but it may vary depending on the size of the palette and the humidity in your environment. Place the palette in a well-ventilated area and allow it to air dry naturally.
| Steps | Description |
| Let the eyeshadow dry and set | Place the palette in a well-ventilated area and let it air dry for a few hours. |
| Avoid using heat sources for drying | Do not use any external heat sources, such as hair dryers, to speed up the drying process. |
Step 6: Clean and Refine the Palette
Once the eyeshadow has dried and set, it’s time to clean and refine the palette. This step is essential to ensure that your eyeshadows are hygienic and ready for use.
| Steps | Description |
| Clean the outside of the palette | Use a clean tissue or paper towel to wipe off any excess eyeshadow or residue from the palette’s exterior. |
| Sanitize the eyeshadow pans | If desired, you can sanitize the eyeshadow pans using a makeup sanitizing spray or isopropyl alcohol. Spray a small amount onto a tissue and gently wipe the pans. |
| Arrange and organize the palette | Once the palette is clean, arrange the eyeshadows back in their original order and organize them for easy use. |
Congratulations! You’ve successfully fixed your broken eyeshadow palette. Now you can enjoy your favorite eyeshadow shades without any frustration.
Tip: To prevent future mishaps, consider storing your eyeshadow palettes in a protective case when traveling or invest in a sturdy makeup bag with padded compartments.
Common Tips and Tricks for Fixing Broken Eyeshadow Palettes
Fixing a broken eyeshadow palette can be a bit tricky, but with some additional tips and tricks, you can make the process even smoother. Here are a few suggestions to ensure the best results:
- Use a pressing tool: Instead of using a small spatula or spoon, some beauty enthusiasts prefer using a pressing tool specifically designed for eyeshadows. These tools provide better precision and make it easier to press the eyeshadow evenly into the pan.
- Mix colors for custom shades: Don’t limit yourself to fixing one eyeshadow shade at a time. If you have multiple broken shades, experiment and mix colors to create new, custom shades unique to your palette.
- Experiment with different textures: Fixing a broken eyeshadow palette also offers an opportunity to experiment with different textures. You can add a few drops of jojoba oil or a creamy pigment base to the pressed eyeshadow to create a cream or liquid eyeshadow consistency.
- Label and date your fixed palettes: Keeping track of your beauty products is crucial, especially if you have a large collection. After fixing your eyeshadow palette, consider labeling and dating the bottom or back of the palette so you can easily identify and monitor their lifespan.
Remember, practice makes perfect. Don’t worry if your first attempt at fixing a broken eyeshadow palette isn’t flawless. With time and experience, you’ll become more skilled and confident in your palette rescue endeavors.
Staring at your wet nail polish for hours? Our article on What to Do When Your Nail Polish Won’t Dry: Easy Fixes has got your back. Discover simple tips and tricks to speed up the drying process and get fabulous nails without the wait. Say goodbye to smudges and hello to quick-drying perfection.
Frequently Asked Questions (FAQs)
Now, let’s address some common questions that may arise when fixing a broken
eyeshadow palette:
1. Can I fix a broken eyeshadow palette using water instead of rubbing alcohol?
While water may seem like a convenient alternative, it’s not recommended for fixing broken eyeshadow palettes. Rubbing alcohol is preferred because it not only helps bind the crushed eyeshadow back together but also evaporates quickly, allowing the eyeshadow to dry and set properly.
2. How long does it take for the eyeshadow palette to dry completely?
The drying time of the eyeshadow palette depends on various factors such as the formula of the eyeshadow, the size of the pan, and the humidity levels in your environment. Typically, it takes a few hours for the eyeshadow to dry completely, but it’s best to leave it overnight to ensure it has fully set before using.
3. What should I do if the eyeshadow palette continues to crumble after fixing it?
If your eyeshadow palette continues to crumble even after fixing it, there might be an issue with the consistency of the paste or the pressing technique. Make sure that you’re using the right amount of rubbing alcohol to achieve a paste-like consistency, and ensure that you press the eyeshadow firmly into the pan to avoid any air pockets. If the issue persists, you may need to repeat the fixing process or consider transferring the eyeshadows into new pans.
4. Can I use this method for any type of compact makeup?
While this method works well for fixing broken eyeshadow palettes, it may not be suitable for every type of compact makeup. It is specifically designed for powdered eyeshadows. Cream, gel, or liquid-based products might require different techniques or ingredients. If you have a different type of compact makeup that needs fixing, it’s best to consult specific tutorials or reach out to the brand for guidance.
Conclusion
Fixing a broken eyeshadow palette is an art and a science. With patience, the right tools, and a bit of creativity, you can restore your favorite eyeshadows and continue to create stunning eye looks. We’ve covered the step-by-step process, shared expert tips, and answered common questions to help you through this journey.
Remember, accidents happen, and we can overcome them with just a little effort. Don’t let a broken eyeshadow palette discourage you. Embrace the challenge, show off your creative side, and enjoy the satisfaction of breathing new life into a shattered palette. Now, go forth and conquer those flawless eye looks like the beauty expert you are!
Further Reading
Here are some additional resources that provide more information on fixing a broken eyeshadow palette:
- We Heart This: How to Fix a Broken Eyeshadow: This article offers a step-by-step guide with clear instructions on fixing broken eyeshadow palettes. It also provides tips and tricks to make the process easier.
- Allure: How to Fix Broken Makeup: Allure shares insights into fixing broken makeup products, including eyeshadows. The article offers a few different methods and tips for repairing broken compacts.
- Beauty Mone: How to Fix Broken Eyeshadow: This blog post provides a detailed tutorial on fixing broken eyeshadow palettes. It includes step-by-step instructions, helpful tips, and photos to guide you through the process.
These resources offer a wealth of information and different perspectives on fixing broken eyeshadow palettes, giving you more options and ideas for successfully repairing your makeup.
FAQs
Can I use a different type of alcohol instead of rubbing alcohol?
Yes, you can use other types of alcohol such as vodka or isopropyl alcohol as a substitute for rubbing alcohol. Just ensure that the alcohol is at least 70% concentration to effectively bind the eyeshadow back together.
How long should I wait for the pressed eyeshadow to dry before using it?
It is recommended to let the pressed eyeshadow dry and set for at least a few hours or overnight. This will ensure that the product is completely dry and won’t crumble when used.
Can I fix a baked eyeshadow that has cracked?
Yes, the same methods can be used to fix a cracked baked eyeshadow. Break the cracked parts into fine pieces, mix with rubbing alcohol, and press it back into the pan. Allow it to dry and set before using.
Can I press loose eyeshadow pigments back into a pan?
Yes, if you have loose eyeshadow pigments, you can repress them into a pan using the same method. Crush the loose pigment into a fine powder, mix with rubbing alcohol, and press it back into the pan. Allow it to dry and set before using.
What should I do if the eyeshadow continues to crumble after fixing it?
If your eyeshadow continues to crumble even after fixing it, it may be due to insufficient binding from the rubbing alcohol or improper pressing technique. You can try adding more rubbing alcohol to the paste or pressing the eyeshadow more firmly into the pan to ensure better cohesion.

Hi, you! I’m Hellen James. I’m a beauty and fashion writer who loves to make the world a little more stylish and I’d love for you to join me in the fun! I’ve been writing about beauty and fashion since I was a kid, but it wasn’t until recently that I really knew what it meant to be a real expert.

